How to Level Ground for a Playset or Swing Set
On this page
To level ground for a playset, measure how far the yard drops across the footprint, then cut away the high side until the area is flat. If the drop is small, set the legs on leveling blocks or timbers instead. If you need to fill the low side, retain it and compact it in thin layers. Whichever method you choose, tamp the base firm and add loose-fill surfacing last. Below are the steps for each method, how level the manufacturers want the site, and the point where a slope is too big for a weekend project.
The same steps apply to a wooden fort, a metal swing set or a small gym set. If you are still choosing a set, our guides to the best swing sets and playsets and the best affordable swing sets cover the models.
How Level Does It Need to Be?
As level as you can make it. Playset manuals give no slope allowance, and they say outright that the ground must be level before you start.
What the Manuals Say
Backyard Discovery’s owner’s manuals tell you to place the set on level ground, and to check that the fort is level before and after each phase of assembly. The Atlas Steel swing set manual adds that if the fort is not level, assembly will be difficult and improper assembly may result. A swing set manual hosted by Lowe’s goes further: it says the play set must be installed on level ground, that uneven ground must be leveled before installation, and that sloping or uneven ground puts stress on the joints, which can leave the unit loose and unstable.
What the CPSC Says
The U.S. Consumer Product Safety Commission’s Outdoor Home Playground Safety Handbook tells you to choose a level location for the equipment. It says this can reduce the likelihood of the play set tipping over and of loose-fill surfacing washing away in heavy rain, and that some sites may need re-grading to improve drainage or to reduce the slope. It also says to install the equipment on level ground with adequate surfacing and anchoring, following the manufacturer’s instructions.
What That Means for You
Treat the manual for your exact model as the rule, and treat level as the target, not a rough guide. A set that starts out of level fights you at every step of assembly, and the twist works into the frame over time. Check your manual for any note about blocking up legs, anchoring and the clearance it wants around the set before you dig anything.
Measure the Slope
Do not eyeball it. A yard that looks flat can still drop enough to matter, and a yard that looks steep may only need a modest cut. Measuring takes about ten minutes and tells you which method to use.
Mark the Footprint and the Safety Zone
Lay out the footprint of the set from the manual, then work out the area around it. The CPSC handbook says to keep play equipment at least 6 feet from any structure or obstacle such as a house, fence, shed, tree or pole, and to extend surfacing at least 6 feet from the equipment in all directions. Swings need more room in front and behind. Backyard Discovery’s manuals give a safe play area extending 6 feet 7 inches (2 meters) beyond the set on all sides. Drive a stake at each corner of the footprint and at the corners of the full zone.
Run a String and Read the Drop
- Tie a string to the stake at the highest corner, a few inches above the ground.
- Run it tight across the footprint to the stake at the low end and hang a line level on it.
- Raise or lower the string at the low end until the bubble centers.
- Measure from the string down to the ground at the low stake. That number is the drop across that span.
- Repeat in the other direction, and along the diagonals, because many yards slope two ways at once.
Write the drops down on a sketch of the footprint. You now know where the high side is, where the low side is, and how much has to move.
Check Drainage While You Are Out There
Look at where water goes after rain. The CPSC handbook says loose fill can wash away on sloped sites and that you should account for water drainage when you contain the surfacing. If the low side of your slope collects a puddle, leveling alone will not fix it, and you will want a gentle fall away from the set once you finish.
Method 1: Dig Out the High Side
This is the method to try first. You cut into firm, undisturbed soil on the uphill side and move that soil downhill, so the set sits on ground that is not going to settle. It works best on gentle slopes where the cut stays shallow.
Steps
- Use your string measurements to pick a finished height. Setting it a little below the original high point means you are cutting more than filling.
- Strip the sod and roots from the whole footprint and safety zone. The CPSC handbook says to clear tree stumps, roots, large rocks, bricks and concrete from the site.
- Dig from the high side until the ground matches the string line. Check with a 4-foot level laid on a straight board, not just the line level.
- Spread the soil you removed on the low side, thinly, and compact it. Do not build a tall fill pile that the legs will sit on.
- Rake the area smooth and check level in both directions and on both diagonals.
Why Cutting Beats Filling
Loose soil piled on the low side settles for a season or two, and a set that was level in May can lean by the next spring. Cut ground does not do that. If you must place some fill, keep the legs of the set on the cut side wherever the layout allows.
Method 2: Leveling Blocks or Timbers
People searching this one usually ask, “Can I put a swing set on unlevel ground?” The honest answer is that you can make up a small difference under the legs, but you should not leave a set standing on a real slope. The manuals above warn that unevenness stresses the joints.
When Blocks Make Sense
Playset leveling blocks and pressure-treated timbers suit a small difference from one leg to the next, or a set that settled slightly after a wet season. They also help on a site where you cannot dig, such as over tree roots you want to keep. Check your manual first, because some makers do not want the legs raised or shimmed, and because the anchoring has to stay as the manual specifies.
How to Do It
- Stand the frame in place and find the lowest leg using your string and level.
- Dig out a small flat pad under every leg, and tamp it firm so the block does not rock.
- Set the blocks or cut timbers on the pads. Use solid blocks sized to the leg, not a stack of loose pieces.
- Raise the low legs until the frame is level in both directions, then recheck every leg for rocking.
- Anchor the legs through the block or timber as the manual describes, so the set cannot slide off.
A tall stack of blocks under one corner is a tipping risk. If you are raising one end of the frame by a large amount, use Method 1 or Method 3 instead.
Method 3: Build Up the Low Side
Raising the low side makes sense when you cannot cut the high side, for example when the uphill edge runs along a property line, a patio or a tree you are keeping. It takes more work to do well, and it fails if you skip the retention or the compaction.
Build a Retaining Edge
Fill needs something holding it in. Set a border of landscape timbers, retaining wall blocks or stone along the downhill edge of the pad, staked or pinned so it cannot slide, and leave it a little taller than your target surface. Lay a drainage path behind or around it so rain does not undercut the fill.
Fill and Compact in Thin Layers
Add soil or a compactable base in thin layers, and tamp each layer firm before adding the next. Thick, loose layers settle unevenly and leave the pad uneven within a season. Check level with the long board after every layer, and finish a touch high so normal settling lands you on level. If you can, wait for a good rain or two, then re-check before you assemble.
Big Slopes: When to Call a Pro
Some yards are past what a shovel and a rented tamper can handle. A professional grading or landscaping crew is worth it when the footprint drops by a large amount, when you need a retaining wall of any height, when water runs toward the house, or when you are not sure what is buried under the lawn. Call your local utility locating service before any deep digging.
What It Costs
Quotes swing with soil, access and how much earth has to move. Hand digging with rented or borrowed tools is the $ tier. Renting powered equipment, or hiring a crew for a day, is the $$ tier. A retaining wall or full regrading with drainage work is the $$$ tier. Get at least two written quotes that state what is included, such as hauling, drainage and finish grading.
Sometimes the cheapest fix is a different part of the yard: moving the footprint a few feet to flatter ground can turn a big regrading job into a small one.
Finish With Safe Surfacing
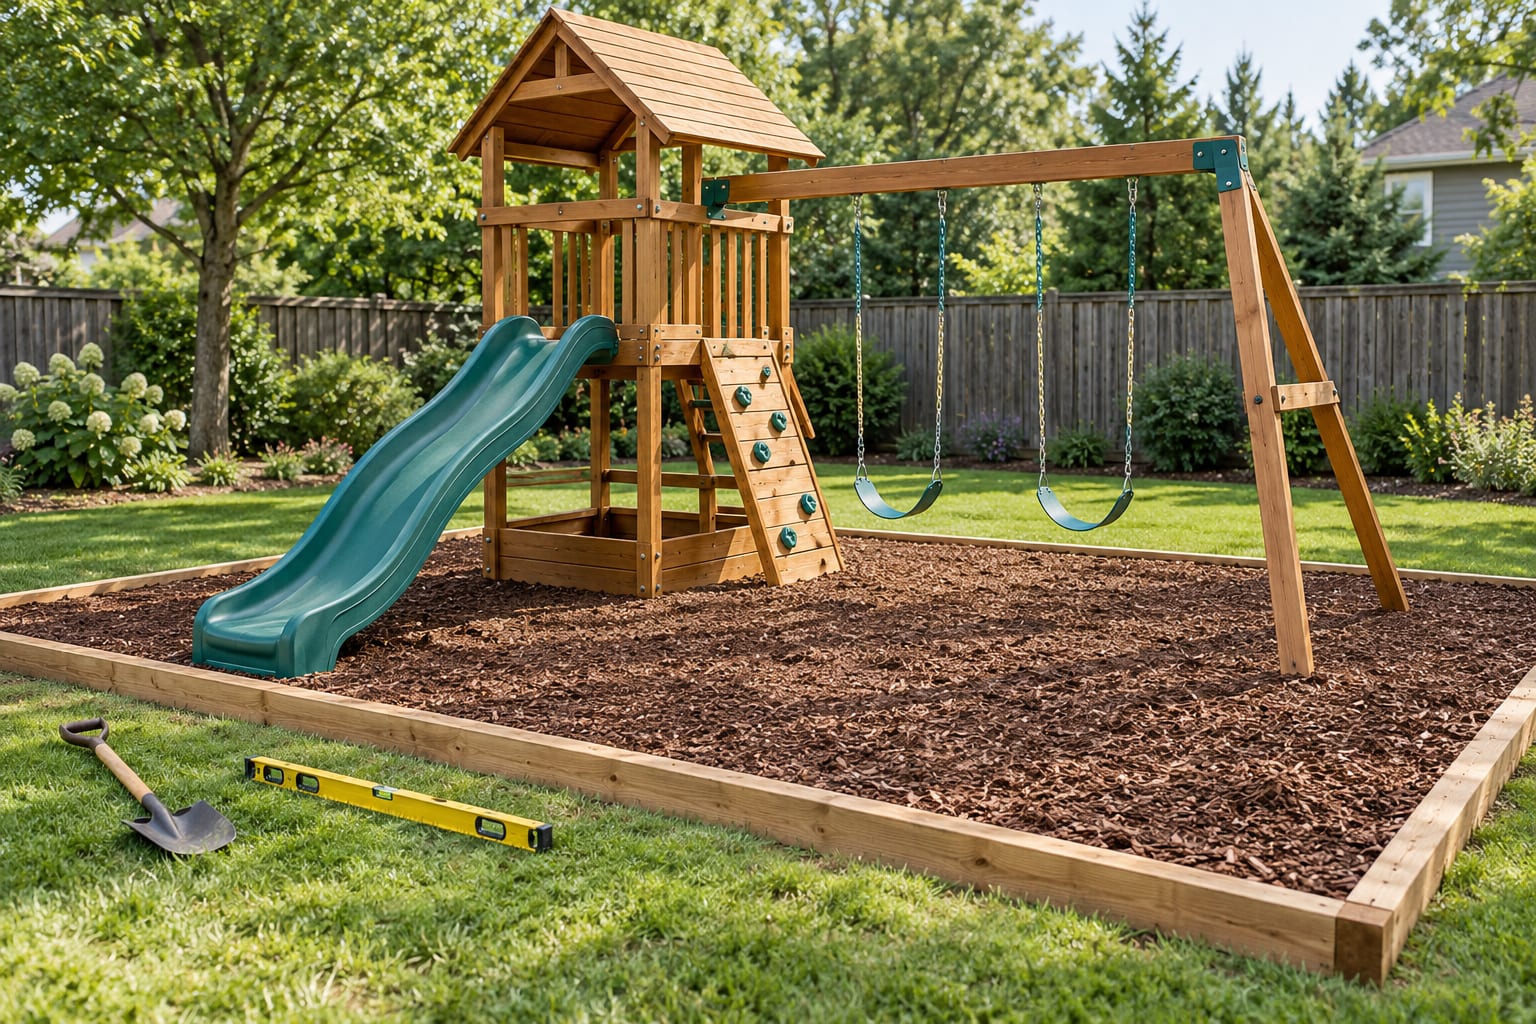
Leveled dirt is not a safe landing. The CPSC handbook says grass and dirt are not considered protective surfacing, because wear and environmental factors can reduce how well they absorb impact. It also says not to install home playground equipment over concrete, asphalt or any other hard surface.
Depth by Material
According to the handbook, you should maintain a minimum depth of 9 inches of loose fill such as wood mulch or chips, engineered wood fiber or shredded rubber mulch for equipment up to 8 feet high, and 9 inches of sand or pea gravel for equipment up to 5 feet high. An initial fill level of 12 inches will compress to about 9 inches over time. For equipment less than 4 feet high, it calls for a minimum of 6 inches.
How Far It Must Extend
Surfacing should extend at least 6 feet from the equipment in all directions. For swings that move back and forth, extend it in front of and behind the swing to a distance equal to twice the height of the top bar. Tire swings need a circle whose radius is the height of the chain or rope plus 6 feet.
Contain It and Keep It Raked
The handbook says to contain loose fill by digging out around the perimeter or lining it with landscape edging, while accounting for drainage. It also suggests marking the correct level on the support posts so you can see when to top up, and raking the surfacing periodically to prevent compaction. This is where your leveling work pays off: a flat base holds the mulch where you put it.
❓ Frequently Asked Questions
Sources
- U.S. Consumer Product Safety Commission, Outdoor Home Playground Safety Handbook (publication 324): site selection, anchoring, assembly and protective surfacing.
- Backyard Discovery owner’s manuals (Atlas Steel swing set and related models): level ground, level checks during assembly, safe play area.
- Swing Sets for Backyard owner’s manual, hosted by Lowe’s: leveling uneven ground before installation.
Ready to buy? See our guides to the best swing sets and playsets and the best affordable swing sets. For a spot to relax while the kids play, try our best hammocks with stand. More how-to help: our guide on how to hang a Little Tikes swing.